Mold Making, Casting, and Finishing Workshop
By Don Wurst, A/K/A oldworldcaster
This is a two Day Experience that will have you turning pennies into dollars.
In this workshop you will learn how to:
- Make blanket molds, glove molds, and open-space molds,
- Make backers, Mother molds, Keeps and shells,
- Select which materials to use making molds and where to get them,
- Select which materials to use casting and where to get them,
- Blend casting materials
- Determine curing time
- Infuse artist's pigments into your castings
- Use glazes
- Use metal leaf and finishes
And so much more!
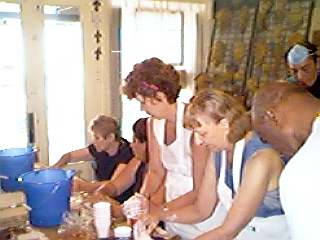
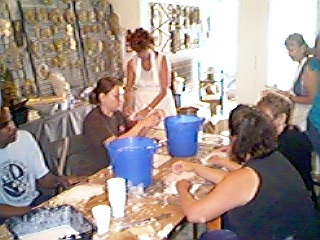
When you arrive at 9 am in work clothes you will start casting. I will have selected 15 items for you to make and work on. You will take home the molds you used. This is the basis of your new business. You will make wall art, free standing art, jewelry and other specialty items. During the workshop you will do various finishes which will perfect your technique.
Thus far you have learned to cast using your new molds and you have learned to finish your product so that they become marketable.
A workbook will be given to you to take home which will refresh your memory of what you learned.
You will be able to produce and sell within a week. Just take your molds home, set up your own TABLE TOP FACTORY, buy some ingredients with $50, JUST ADD WATER, cast as you learned, finish the product, and sell it as you learned in the course. Just tell people "Don't take it for granite, it's concrete or cement!"
The fee is $1,595 (usually way less than two days of show sales) and you will want to spend a night or two near Asheville,NC, (For a good deal try Hotwire,Travelosity, Orbitz, Expedia or check the Helendorf site..). You workshop will be held in my studio in Edneyville, NC and the date will be based on requests. When you leave at 5 pm the second day you will carry what you made, your workbook, and all the knowledge in your head plus the molds you need to grow your profitable decorative art business.
This program is flexible in that it can be split into 2 courses, the first being a valuable knowledge of casting and finishing. This includes the molds used in the workshop and a solid foundation to start making money immediately.
The second portion is a more detail and business oriented instruction. You will not only have the knowledge of casting but you will gain the skills to continue with making your own custom molds. Arrangements can be determined upon your request for more information.
Want to talk with me? To express an interest or to enroll in this workshop just email me at oldworldcaster@yahoo.com or call me at (601) 334-0599. Mailing address 378 Laurel Creek Drive, Hendersonville (Edneyville), NC 28792
Natural Rubber Molds
One major key to a successful casting business is the learned skill of mold making. A mold is a negative of an item to be reproduced. A simple example of a mold is an item (like a cameo) impressed into a slab of clay. When you remove it there is a negative impression. That impression is a mold.
A mold is then filled with a liquid will harden into an exact reproduction of the item from which the mold was made. The casting liquid could be cement, concrete, hot glue, paper mache, resin, etc. Once it hardens you can remove the finished item.
There are many ways to make a mold, but for this business I’m going to specialize on natural rubber molds. The reasons include 1) price, 2) long life, 3) easy and 4) free from tools.
Anyone can make good rubber molds with a little coaching. The procedure is simply to put layers of latex on the item until you reach the thickness you want and need. It is critical how you put the first couple of layers on.
The item you are going to reproduce must be clean. Some surface covers are poor to try to copy. For example raw (untreated) portland concrete has hundreds of little hole in it. The latex would go into the holes and be difficult (or impossible) to take off when the mold is finished. The solution would be to spray seal or paint the cement. If the paint or sealant, like polyurethane) isn’t completely dry it may come off inside the mold and ruin you mold.
If the item you want to reproduce is metal it may react badly with the latex. Again your solution may be to coat with paint or a sealant.
The reaction is usually with the ammonia in the latex.
To make latex liquid, water and ammonia are added to the raw latex. Ammonia is a hazard to work with. You should only work with it in a well ventilated. Outside is good. Smelling too much ammonia may cause you to loose your sense of smell. Too much ammonia could cause blindness.
There are three ways to get items to cast. You can make them. You can assemble them. You can find them. Finding them runs the risk of copyright infringement. You can’t copy something that is copyrighted. I think almost everything more than 40 years old is OK, but you should check yourself.
China does’t respect copyright laws so many items made in China are fair game to me. If I see a copyright I just leave it alone. If it is new (within 40 years) and doesn’t have a copyright or country of origin I still don’t copy it because original items don’t have to have to have copyright on them to be a copyright. Some things made in China are copyrighted by someone who has contracted to have their item made.
Once you have the item you put it on a flat surface (a board, a piece of plywood, plexiglas) and coat the original with latex. You apply a thin coat of latex with a bouncing method using a natural “chip” 1” brush.
Before you use the brush dip it into a cup of water with liquid soap in it. This is preconditioning of the brush. After using the brush on latex use a paper towel to squeeze out the excess latex and put the brush in the soapy water.
Prior to using the brush the next time squeeze it in a paper towel to get it ready to take the latex. Damp brushes are fine. Wet isn’t.
The pouncing (bouncing) does two things--it get the latex into every little hole and it creates little pox marks take the next layer.
The latex starts drying as soon as you put it on. You must work fairly quickly. The drying is faster on untreated plaster since the plaster sucks water from the latex while the air draws the water from above.
If you are putting on the latex too slowly you may stick to the earlier latex and pull it off the original leaving an air pocket. The mold will be ruined.
If you don’t let each layer fully dry the next layer will dry and lock in wet latex. That undried latex will be spongy and tear easily. The mold is ruined.
Color is the first way to see if a layer is dry. Touch is the second way. If you touch the mold and latex comes of on your finger it is still wet. Be careful with this test so that you don’t ruin the mold. The thinest layer of latex will dry first. When the entire layer is the same color you are dry.
It is important that each layer cover the mold entirely. If you have thin places when you remove the mold it may tear. The thin place will also wear out first.
A number of things will determine how long your mold lasts. I’ve been averaging about 7 years per mold. If you keep your molds in a very high temp. they faster. Sunlight is bad long term for molds, but is good when you are making molds. While making molds sunlight helps the water in the latex evaporate.
You can add color to your latex I’ve added color to each of three quarts of latex. My first coat could be purple. My second container of latex could be green and it would be clear where you could miss a place. My third layer could be gold. When I have this layer on all you see is a gold colored mold.
If you do this once or twice you would have enough experience to not need to do this again.
The cheapest and easiest to use is a poster board paint. It is always the cheapest available and it is advertised as washable.
When I take the mold off the board I leave a flat surface around the base of at least 1/2 inch. An inch might be better on big molds since often you grab this ledge to start pulling the mold away from the new casting.
If the mold sticks too hard to the new casting you can wipe the outside of the mold with liquid soap--any brand. In a couple of minutes the mold comes off easier. You only need to do this only every once in a while.
Commercial mold release is available but it is expensive. I’ve used “Armor All” made for car cleaning like auto tires. I like it.
I use a little scissors to trim the edges of my molds. Have I told you I’m cheap. I save this scrap rubber and use it around the edge of items I’m making a mold of.
You can buy man made rubber and it is believed by many to be better than natural latex. I disagree. But it does last longer. I’ve found that success isn’t guaranteed. I screw up the 50-50 mix, or the stirring or... It is also many times more expensive. Many mold makers swear by it so check with them.
Either Sculpey or Premo man made clay makers (oil based?) sell a mold making clay. (Not molding clay) You can simply push in the item you want to make and take it out and bake according to their directions. It works, but I haven’t liked it.
When I make a latex mold I don’t use a mold release. With clay or man made rubber you may want a mold release on the original. Pam cooking spray oil is what I prefer. Some people like Vaseline petroleum jelly. Too difficult and messy for me.
You should number every mold you make with your own numbering system. I like a four digit numbering system. I set up a class of molds, like garden items. I make all of them 1000 numbers. My small molds may be 10-- for my first 99 small garden molds. My medium garden molds could be 14-- for my first 99 medium garden molds. My Large garden molds may start at 17--. My crosses may start at 2000. My medieval molds may start at 3000. And so forth.
Do as I say and not as I do. I sure said that to my kids a lot while they were growing up. I didn’t start a numbering system until I had about 1400 molds. --Far too many-- I’ve never really caught up and now I have a hard time sometimes looking for a mold.
You should keep an original and write the number on it and you should write the number on the mold. You should take a picture of the new and label it with you number and start a database on your computer. You could then back up the database on a free website on the web.
The reason you make your own molds is so that you control exactly what you make and sell. There are thousands of mold available for sale, but you will have limited success if you are just like everyone else.Sometimes I buy molds. I’ve never bought a big seller. I have bought some that I modify and then make my own mold. I may buy a fleur de lis mold and cast it and then add words, like “New Orleans.”Commercial molds are often made out of one type of plastic or another. Without a mold release they can be very hard to get out of the mold. A mold release adversely affects my type of finish. Therefore, no mold release and therefore a hard time.In short, learn to make good rubber molds (natural latex) and you will be unique, profitable, and happy. Don Wurst Old World Caster
www.justaddwater.yolasite.com oldworldcaster@gmail.com